
Table of Contents
- Why Safe Pressure Washing for Residential Siding Matters
- Recommended PSI for Vinyl Siding and Other Materials
- Soft Washing vs Pressure Washing Siding: Which Method Wins?
- Essential Pressure Washing Safety Precautions for Homeowners
- A Step-by-Step Guide to Safe Pressure Washing for Residential Siding
- Common Mistakes That Damage Siding
- When to Call a Professional for Safe Siding Cleaning
- Conclusion
- Frequently Asked Questions
Last Updated: September 6, 2026
Why Safe Pressure Washing for Residential Siding Matters
Safe pressure washing for residential siding removes dirt, mildew, and algae using controlled water pressure matched to your cladding material. Get this wrong and you can blast water behind walls, etch wood grain, or scour mortar. Get it right, and you restore curb appeal without costly repairs. The damage from DIY attempts gone wrong is almost always preventable.
Most homeowners assume more pressure equals a cleaner house. The opposite is true. The most common injuries on Australian homes come from overzealous cleaning with a rented machine cranked to maximum output. Vinyl siding, fibre cement, timber, and brick each demand a different approach, and understanding that difference is the foundation of safe pressure washing.
Below, we’ll show you exactly how to match pressure to material, when to switch to soft washing, and the step-by-step process that protects your home.
Recommended PSI for Vinyl Siding and Other Materials
The recommended PSI for vinyl siding is 1,200 to 1,500 PSI with a wide fan spray (cleanertalk.com). That’s enough to shift grime without forcing water behind the panels. Your machine’s maximum pressure matters less than the pressure at the nozzle tip, which is what actually contacts the surface.
Matching PSI to Your Siding Material
Every cladding material has a pressure ceiling. Exceeding it is where surface damage begins.
| Siding Material | Safe PSI Range | Spray Pattern | Key Risk If Exceeded |
|---|---|---|---|
| Vinyl | 1,200 – 1,500 | 40-60° fan | Water intrusion behind panels |
| Timber / wood grain | 500 – 800 | 60° fan, soft wash | Etching and furrowing of grain |
| Fibre cement | 1,500 – 2,000 | 40° fan | Surface abrasion and chipping |
| Brick and mortar | 1,500 – 2,500 | 25-40° fan | Blown-out mortar joints |
| Stucco | 800 – 1,200 | Soft wash preferred | Cracking and water damage |
For timber and stucco, we strongly recommend soft washing over direct pressure. A low-pressure setting paired with a cleaning solution removes mildew and algae growth without the risk of surface damage. The water pressure is doing less work; the chemistry does the heavy lifting.
Soft Washing vs Pressure Washing Siding: Which Method Wins?
Soft washing wins for fragile surfaces; pressure washing wins for resilient ones. The choice isn’t about which is better overall, but which suits your siding material and the level of soiling present.
Soft washing uses low pressure, typically under 500 PSI, combined with a biodegradable cleaning solution applied through a dedicated injector. It excels at killing algae and mildew at the root rather than merely blasting the visible growth away. Pressure washing, by contrast, relies on water force alone and suits hardy surfaces like brick and concrete paths.
For most residential siding, especially vinyl and painted timber, soft washing is often preferred. It’s gentler on the home, uses less water, and the results can last longer because the organic growth is actually treated, not just displaced. Pressure washing remains useful for prepping a surface before repainting or for heavy grime on masonry.
Essential Pressure Washing Safety Precautions for Homeowners
Safety in pressure washing is two-sided: protecting yourself and protecting the property, including the surrounding environment. The Australian Standard for high-pressure water jetting equipment Safe Work Australia guidance on high-pressure water jetting outlines the physical risks of high-pressure streams, which can penetrate skin and cause serious injury. Treat the wand as you would a power tool, because a 2,000 PSI stream is exactly that.
Before you start, fit protective gear: safety goggles, closed-toe boots, and long sleeves. Electrical outlet protection matters, so cover all exterior outlets with plastic sheeting and switch off power to external fittings where possible. Walk the perimeter and tape over weep holes on brick veneer, which are designed to let moisture escape. Forcing water into them at high pressure can flood your wall cavity and lead to water intrusion and timber rot.
Never point the wand at people, pets, windows, or light fittings. A high-pressure stream can shatter glass and cause soft-tissue injury on contact. Also avoid using a pressure washer on a ladder; the recoil can knock you off balance. Work from the ground with extension wands where possible.
The Overlooked Hazard: Chemical Runoff
A safety dimension most guides miss is what happens to water and chemicals after they hit your siding. In many Australian urban areas, stormwater drains flow directly into local creeks and rivers without treatment. Detergents, bleach, and algaecides that wash off your house can be toxic to aquatic life.
Before you start, check your local council’s guidelines on wastewater disposal. Many councils have specific rules about directing wash water away from storm drains and onto your lawn or garden, where the soil can filter some contaminants. A simple practice is to use a biodegradable cleaning solution and to pre-wet your garden beds so they can dilute the runoff. If you are cleaning near a driveway that slopes toward the street, consider using a sandbag or a wet/dry vacuum to capture the initial, most chemical-heavy runoff.
Ladder Safety and Two-Storey Work
A leading cause of injury during DIY pressure washing is combining ladders with a high-recoil wand. The force can easily push you backward, and the reaction torque when you squeeze the trigger can twist your body. If you must use a ladder, have a second person stabilise the base, and never reach sideways, climb down and reposition instead. For most two-storey work, a telescopic wand extension rated for your machine’s pressure is far safer.
Protecting Your Home’s Fabric
Protect your home’s vulnerable points. Seal around window frames and door thresholds with painter’s tape if you suspect gaps. Cover external light fixtures and security cameras with plastic bags secured with rubber bands. Keep the spray at least a metre away from gas meters and electrical service panels. A high-pressure stream can strip paint from trim and window sills, so reduce pressure or switch to soft washing near these areas.
A Step-by-Step Guide to Safe Pressure Washing for Residential Siding
This process works for most siding types when you respect the pressure limits above.
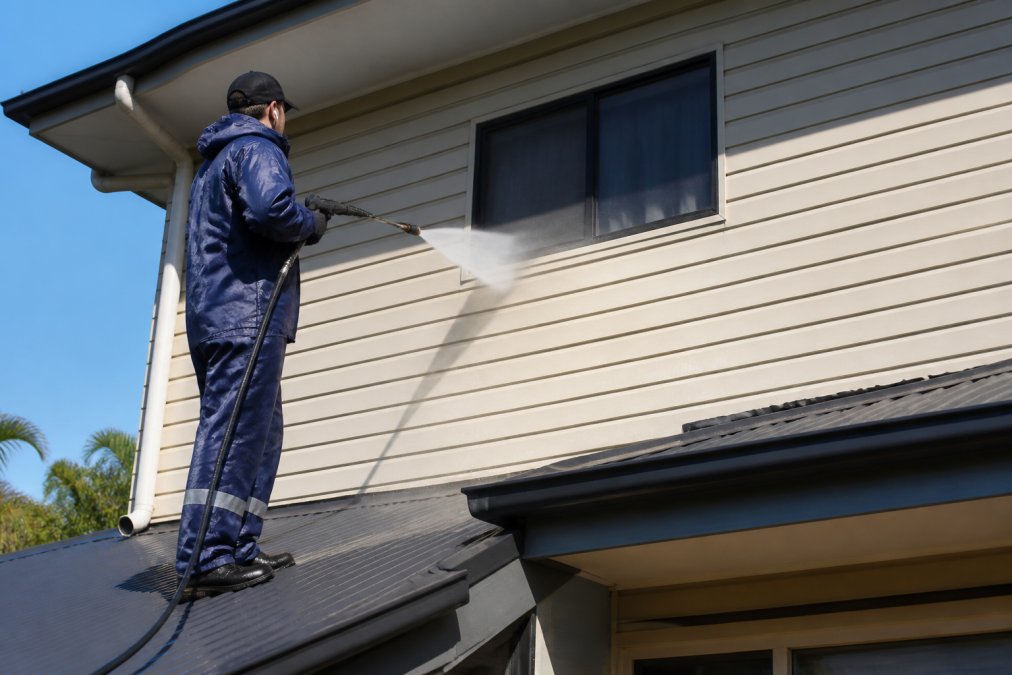
Step 1: Preparation and Area Protection
Clear the area around the house. Move potted plants, outdoor furniture, and BBQ covers away from the work zone. Wet down garden beds and lawns thoroughly before applying any cleaning solution; pre-wetting reduces chemical absorption. Cover electrical outlets with plastic sheeting and tape, and close all windows and doors tightly.
Connect your machine to a water supply and fit the widest fan spray nozzle tip you have, typically 40 to 60 degrees. The wider the spray pattern, the lower the impact per square centimetre. Test the pressure on an inconspicuous corner of the siding before you commit.
Step 2: Applying the Right Cleaning Solution
For vinyl and painted surfaces, a dedicated house wash solution formulated for pressure washer detergent injection is the right call. Avoid bleach-heavy mixes on painted surfaces; they can cause chemical burn and discolouration. For timber, use an oxygen bleach-based cleaner designed for wood grain.
Apply the cleaning solution from the bottom up using a low-pressure setting. Working upward prevents the solution from running down onto dry, untreated areas and creating streaks. Allow the solution to dwell for five to ten minutes, but do not let it dry on the surface. In direct sunlight, work in smaller sections to keep the cladding damp.
Step 3: Rinsing and Post-Cleaning Care
Rinse from the top down using a wide fan spray. This is the critical direction change: top-down cleaning lets dirty water run over already-rinsed surfaces without leaving marks. Keep the wand moving in smooth, overlapping passes, holding the nozzle tip roughly 300 to 450 millimetres from the surface.
Keep the wand angled slightly downward so water runs off the face of the siding rather than being driven up under the panels. After rinsing, remove the protective sheeting from outlets and water your garden beds again to flush any residual cleaning solution from the soil. Inspect the siding for any missed patches while it’s still damp.
Common Mistakes That Damage Siding
The most destructive mistake is using a narrow, high-pressure jet on soft materials. A zero-degree nozzle tip concentrates the full machine output into a pinpoint stream that can gouge timber, fracture fibre cement, and strip paint in seconds. Always start with the widest fan spray and narrow it only if needed, and only on hard surfaces.
Another frequent error is cleaning on a hot day. Cleaning solution dries quickly in direct sun, leaving chemical residue that is difficult to rinse off and can stain the siding. Neglecting the rinse cycle also attracts dirt faster than if you had not cleaned at all.
If you’re cleaning a two-storey home, don’t risk a ladder with a pressure washer in hand. Use a telescopic wand extension from the ground or hire a professional. The recoil from the wand on a ladder is a leading cause of falls during DIY exterior cleaning.
Material-Specific Failure Modes
The damage from pressure washing follows predictable patterns for each siding type. Understanding these failure modes helps you avoid them and diagnose problems if they occur.
Vinyl siding is the most forgiving but has a hidden vulnerability: the overlap joints. If you direct water upward at the base of a panel, you can force water into the wall cavity. The panel itself may look fine, but the trapped moisture can lead to mould growth behind the siding. The classic sign of this mistake is water dripping from the bottom edge of the wall hours after cleaning, or a musty smell developing over the following weeks.
Fibre cement (commonly sold as HardiePlank or similar) is dense but brittle at the edges. A narrow spray held too close can chip the factory-cut edges, creating a rough, white scar that is nearly impossible to repair without replacing the board. The damage often appears as small, light-coloured pits along the bottom edge of each plank where the spray has hit the cut end grain.
Timber siding shows two distinct damage patterns. The first is furrowing, the soft springwood between the grain lines is washed away, leaving a corrugated, rough surface that holds dirt and mildew more readily than before. The second is water staining: if you hold the wand too close, the impact forces water into the wood fibres, causing a dark, blotchy appearance that can take weeks to dry out and may never fully return to its original colour.
Troubleshooting Damage Post-Wash
If you suspect damage, act quickly. For vinyl, feel the bottom edge of the wall for dampness; if wet, remove the bottom panel to let the cavity dry and inspect for mould. For timber furrowing, stop cleaning and let the surface dry. Light sanding with 120-grit paper can smooth minor furrows, but deep etching may require professional assessment. For fibre cement chips, clean the area, apply exterior-grade acrylic caulk, and touch up with matching paint. For water staining on timber, let it dry naturally for several days before assessing whether a stain-blocking primer and repaint is needed.
When to Call a Professional for Safe Siding Cleaning
If your home has two or more storeys, features fragile cladding like stucco or aged timber, or shows existing damage such as cracked panels or failing paint, professional help is safer. The same applies if you don’t own a machine rated for the job; hiring an underpowered unit and compensating with chemicals or close range is a recipe for surface damage.
AquaBlast Elite provides safe pressure washing for residential siding across Sydney and its surrounding areas. Our skilled professionals use modern equipment and customized solutions, ensuring the pressure, spray pattern, and cleaning agents match your siding material. We assess the surface first, protect the surrounding areas, and clean without risking water intrusion or abrasion.
Pricing depends on the size of your home, the siding material, and the level of soiling, so check our website for a quote. If you’re preparing a property for sale or simply restoring its curb appeal, the peace of mind that comes from an experienced team can be a worthwhile investment.
Conclusion
Safe pressure washing for residential siding comes down to matching your technique to the material. Respect the pressure limits, use a wide fan spray, clean from the top down, and know when soft washing is the better tool. Most damage happens when homeowners rely on maximum force rather than the right combination of pressure, solution, and distance.
Getting a professional assessment can save you from costly repairs. AquaBlast Elite delivers superior results that leave surfaces looking their best, with years of industry expertise and a focus on protecting your property throughout the process. BOOK A CALL with our team and let us handle the rest.
Frequently Asked Questions
Is it safe to pressure wash house siding?
Yes, pressure washing siding is safe when done correctly with the right equipment and technique. The key is using the recommended PSI for your specific material. For example, vinyl siding should be cleaned at a lower pressure, around 1200-1500 PSI, using a wide-angle nozzle. Using excessive pressure or a narrow spray pattern can force water behind the siding, leading to mould growth or structural damage. If you are unsure about your home’s siding, consider professional pressure washing services to avoid costly mistakes.
What PSI is recommended for cleaning residential siding?
The recommended PSI for residential siding varies by material. For vinyl and aluminium, use a maximum of 1300-1500 PSI. Softer materials like timber or fibro cement require even less pressure, often below 1200 PSI, or a soft washing method. High pressure, like 2000 PSI or more, is too strong for most residential siding and can etch surfaces, strip paint, or crack panels. Always start with the lowest effective pressure and test an inconspicuous area first.
What is the difference between soft washing and pressure washing siding?
Soft washing uses low pressure (under 500 PSI) combined with specialised cleaning solutions to remove algae, mould, and mildew. It is safer for delicate surfaces like timber, stucco, and older vinyl. Pressure washing relies on high-pressure water to blast away dirt. While effective on concrete, it can easily damage residential siding. For most siding types, soft washing is often the safer and more effective choice, as the cleaning solution kills organic growth at the root, providing longer-lasting results.
What cleaning solution should I use before pressure washing my siding?
A dedicated house wash solution or a mix of oxygen bleach and water is effective and safe for most siding materials and your garden. Oxygen bleach breaks down organic stains like algae and mildew without the harsh effects of chlorine bleach, which can damage plants and discolour siding. Apply the solution from the bottom up using a low-pressure sprayer, allow it to dwell for 5-10 minutes, and rinse from the top down. Always follow the manufacturer’s instructions for dilution.