
Table of Contents
- Why Pressure Washing Preparation Matters
- Step 1: Clear the Perimeter and Remove Obstacles
- How to Protect Plants During Pressure Washing
- How to Prepare Outdoor Electrical Outlets for Cleaning
- Step 2: Secure Windows, Doors, and Entry Points
- Step 3: Apply Detergents and Pre-Treatment Solutions
- Pressure Cleaning Cost Sydney: What Affects the Price
- Common Preparation Mistakes to Avoid
- Frequently Asked Questions
Last Updated: September 27, 2026
Why Pressure Washing Preparation Matters
Pressure washing preparation is the set of steps you take before a pressure washer touches your home’s exterior. Done well, it protects plants, wiring, seals and finishes while giving you a cleaner result. Done badly, it causes water damage, stripped paint and dead garden beds.
Never point a pressure washer at an outdoor power point, meter box or light fitting. Water forced into a live electrical fitting can trip your switchboard or, worse, create a shock risk. Switch off and cover these fixtures before you start.
Step 1: Clear the Perimeter and Remove Obstacles
Start by walking the full perimeter of your home and removing anything loose or fragile. This is the step most people rush, and it’s the one that causes the most damage.
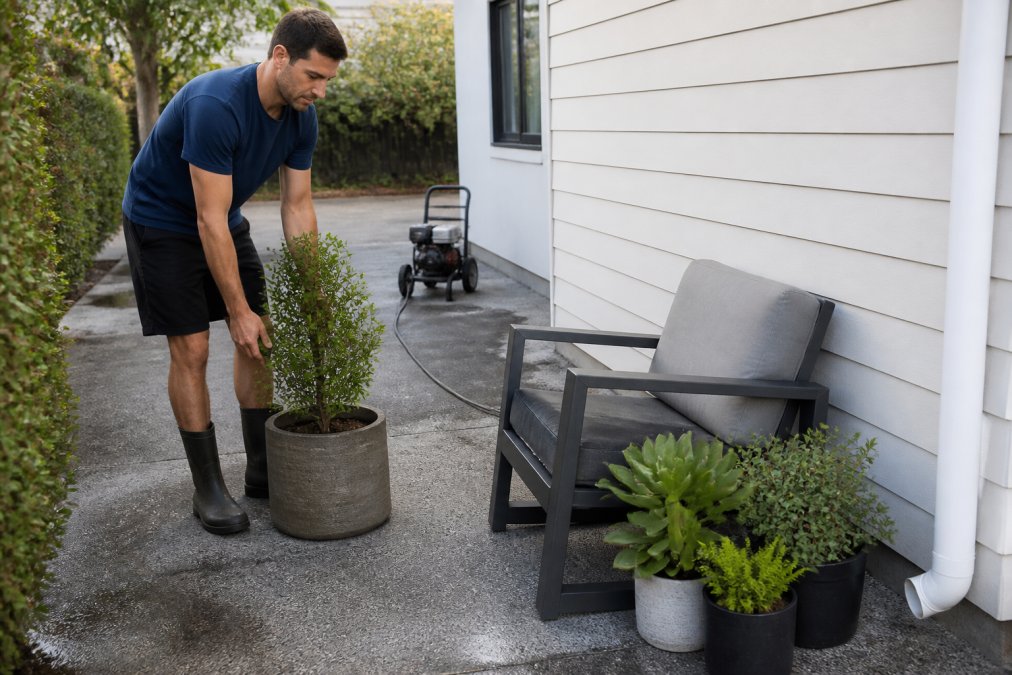
Move or secure these items:
- Outdoor furniture, BBQs and pot plants
- Doormats, bins and garden hoses
- Kids’ toys, tools and pet bowls
- Wind chimes, hanging baskets and loose signage
- Cars parked within spray range
How to Protect Plants During Pressure Washing
Protecting plants during pressure washing comes down to three things: covering them, wetting them down first, and keeping detergent runoff away from their roots.
Here’s what works:
- Water garden beds thoroughly before you start. Wet soil dilutes any detergent that reaches it.
- Cover delicate plants with tarps or old sheets, weighed down at the edges.
- Tie back shrubs and small trees so they aren’t in the spray path.
- Move potted plants at least three metres from the wall.
- Rinse garden beds with clean water straight after the job.
How to Prepare Outdoor Electrical Outlets for Cleaning
Preparing outdoor electrical outlets for cleaning means cutting the power, sealing the fitting, and keeping your spray at least a metre away.
Do this before you start:
- Switch off the circuit that feeds your outdoor outlets at the switchboard.
- Confirm the power is off by testing the outlet with a plug-in tester.
- Cover each outlet with plastic wrap and secure it with tape.
- Do the same for light fittings, security cameras and sensor lights.
- Note the location of your meter box and stay well clear of it.
Take a photo of your switchboard before you flip anything. If a breaker trips mid-job, you’ll know exactly which one to reset without guessing.
Step 2: Secure Windows, Doors, and Entry Points
Seal every gap where water could get inside. Windows, doors and vents are the most common entry points for water damage during a pressure wash.
Check and protect these areas:
- Close and latch all windows, then check the seals for cracks
- Tape over external door gaps and pet doors with plastic sheeting
- Cover air conditioning units and external vents
- Seal garage doors at the base with a towel or foam strip
- Check weep holes in brickwork and leave them clear, not taped over
Step 3: Apply Detergents and Pre-Treatment Solutions
Pre-treatment does most of the cleaning work before the pressure washer even starts. Applying detergent first softens dirt, mould and algae so the rinse removes them with less pressure. But the mix, the dwell time and the pressure setting all change depending on what your home is clad in, and that surface-specific prep is where most generic guides stop short.
The order is consistent across surfaces:
- Choose a detergent suited to your surface (see the breakdown below).
- Apply it from the bottom up so you don’t leave streaks down clean sections.
- Let it dwell for the time stated on the label, usually five to ten minutes.
- Keep the surface wet. Don’t let the detergent dry in the sun.
- Rinse from the top down with a low-pressure setting.
Surface-specific preparation
Sandstone. Sandstone is soft and porous, and it holds moisture. Pre-wet the stone thoroughly before applying anything so the cleaner doesn’t soak in unevenly, and use a pH-neutral stone cleaner rather than a general detergent. Avoid acidic cleaners entirely, they etch the surface and leave a permanently lighter patch. Keep the pressure low and the nozzle moving; a single stationary pass can carve a visible line into the face of the stone.
| Surface | Pre-Treatment | Pressure Setting | Key Risk |
|---|---|---|---|
| Sandstone | pH-neutral stone cleaner | Low | Etching, moisture soak-in |
| Brick | Soft wash mix | Low to medium | Lime mortar erosion, blocked weep holes |
| Render | Soft wash mix | Low | Crack propagation, coating lift |
| Timber | Timber-safe cleaner | Low | Raised grain, stripped sealer |
| Concrete driveway | Degreaser plus mould treatment | Medium to high | Surface etching if too hot |
| Roof tiles | Mould and algae treatment | Low to medium | Cracked tiles, dislodged ridge caps |
Runoff and local requirements
Detergent runoff is not just a garden problem. In most local council areas, suds and chemical-laden water must not flow into the stormwater system, because that system drains to creeks, harbours and beaches without treatment. A common pattern is to direct runoff onto a lawn or garden bed where it can break down, or to contain it and dispose of it via the sewer (which goes to a treatment plant) rather than the storm drain.
Pressure Cleaning Cost Sydney: What Affects the Price
Pressure cleaning cost in Sydney depends on the size of the job, the surface type, how much prep is needed, and how much access your property allows. No two quotes are the same, and that’s normal. A single-storey brick home with a clear driveway is a very different job to a three-storey render property with tight side access and heavy mould.
The main cost drivers are:
- Surface area. More square metres means more time, water and detergent.
- Surface type. Soft surfaces like render and timber need gentler, slower work.
- Level of soiling. Mould, algae and graffiti take longer than light dust.
- Access. Steep blocks, narrow side paths and locked gates slow the crew down.
- Height. Two-storey and three-storey work needs different equipment and safety measures.
- Prep required. Moving furniture, covering plants and protecting fixtures all add time.
- Runoff management. Containing and disposing of wastewater properly adds time and equipment.
DIY versus hiring: the real trade-off
The honest comparison isn’t just the hire cost against the quote. It’s the total cost of doing it yourself, which includes:
- Equipment hire. A decent pressure washer rents for a day rate, and you’ll often need a surface cleaner attachment and an extension hose for anything above ground level.
- Detergents and treatments. Surface-specific cleaners cost more than a general-purpose bottle, and you’ll use more than you expect on a large wall.
- Water. A pressure washer uses a lot of water, and if you’re on a meter that shows up on the bill.
- Your time. Prep, washing and clean-up on a typical single-storey home is a full day’s work, often more.
- Risk. The cost of getting it wrong, stripped render, raised timber grain, water in a wall cavity, usually exceeds the cost of hiring someone who does it every week.
How to compare quotes fairly
Ask any provider what’s included. A price that excludes prep and plant protection isn’t a fair comparison to one that includes it. Specifically, check whether the quote covers:
- Pre-treatment and dwell time, or just a rinse
- Plant and fixture protection
- Runoff containment and disposal
- Surface-specific methods (soft wash for render and timber, not just high pressure)
- Clean-up and a post-wash inspection
Common Preparation Mistakes to Avoid
Watch out for these:
- Leaving windows cracked. Even a small gap lets water in at pressure.
- Forgetting the meter box. Spray near it can trip your power or damage the seal.
- Skipping the pre-wet on gardens. Dry soil soaks up detergent like a sponge.
- Using too much pressure on soft surfaces. Timber and render mark easily.
- Ignoring runoff. Suds flowing into storm drains are a problem in most councils.
- Not checking the weather. Wind blows spray onto cars, neighbours and clean surfaces.
Prep takes an hour or two. Fixing water damage, dead plants or stripped timber takes weeks and costs far more. The hour you spend taping, covering and moving things is the cheapest insurance on the job.
If you’d rather leave it to a crew that preps every job the same way, that’s what we do. AquaBlast Elite brings its own protective gear, covers and surface-specific methods to every site. Book a call and we’ll walk you through what your property needs.
Frequently Asked Questions
What should I cover before pressure washing my house?
Cover or seal outdoor electrical outlets with waterproof tape, close all windows and doors tightly, and remove or protect light fixtures. Move furniture, potted plants, and vehicles away from the work area. For plants you cannot move, water them thoroughly and cover with tarps. This pressure washing preparation prevents water damage and protects delicate items.
What are the don’ts when pressure washing a house?
Don’t spray directly at windows, doors, or electrical outlets. Avoid using high pressure on timber, painted surfaces, or older masonry, as it can cause damage. Never point the nozzle at people or pets, and don’t let water runoff flow into storm drains without checking local regulations. Always wear protective gear and avoid working on ladders in wet conditions.
How long does it take for a house to dry after pressure washing?
Drying time depends on the weather and surface. In warm, windy conditions, most exterior surfaces dry within 2 to 4 hours. Cooler or humid weather can extend this to 24 hours. Ensure proper ventilation and avoid painting or sealing until the surface is completely dry. Check for standing water in crevices before considering the job done.
Do I need to be home during the professional pressure cleaning process?
It’s best to be home for the initial walkthrough to point out any concerns and confirm preparation steps. After that, you can leave if you’re comfortable. Professional services like AquaBlast Elite will manage the process, but being available for a final inspection ensures everything meets your expectations. Always secure pets and inform neighbours if needed.
Preparing your home for pressure washing isn’t glamorous, but it’s the difference between a clean exterior and an expensive repair bill. AquaBlast Elite handles the full process for you, from clearing the perimeter and protecting your garden to matching the right pressure and detergent to each surface. Our team works across the region with equipment suited to render, timber, concrete and tile. Get started with AquaBlast Elite and see your home’s exterior restored without the risk.