
Table of Contents
- Why Mold Keeps Coming Back to Exterior Walls
- Best Mould Killer for Exterior Walls: What Actually Works
- Step-by-Step Mold Removal and Surface Preparation
- Preventing Mould on Timber Cladding and Other Porous Surfaces
- Seasonal Maintenance Schedule for Mold Regrowth Prevention
- Professional Exterior Pressure Cleaning Services: When to Call In Experts
- Conclusion
Last Updated: August 27, 2026
Why Mold Keeps Coming Back to Exterior Walls
Preventing mold regrowth on exterior walls is one of the most persistent challenges homeowners face. Most DIY treatments fail because the surface gets cleaned but the underlying cause gets ignored. At AquaBlast Elite, we see this pattern constantly: mould returns within weeks because the moisture conditions that triggered the original growth were never addressed.
Structural Moisture and Water Ingress
Water ingress is the root cause behind most recurring mould problems on exterior walls. Cracked render, deteriorating mortar joints, failed caulking around window frames, and damaged flashing all allow moisture to penetrate behind the surface layer. Once water sits within a porous wall substrate, it creates ideal conditions for fungal colonies to establish themselves from the inside out.
Structural dampness is particularly insidious because you may clean the visible surface thoroughly and still see mould return within a season. Inspecting for water ingress points, including checking around downpipes, window reveals, and roof-to-wall junctions, should precede any mould treatment.
Thermal bridging also contributes to mould growth. Where wall sections conduct heat differently, condensation forms on cooler external surfaces, particularly on south-facing walls that receive limited direct sunlight. This persistent surface moisture is enough to sustain mould without any structural leak present.
How Humidity and Condensation Drive Spore Growth
Mould spores are present in outdoor air at virtually all times. They become a problem when relative humidity at the wall surface stays above roughly 70% for extended periods. This is why mould clusters on shaded walls, under eaves, and in areas with poor air circulation.
A hygrometer is a practical tool for monitoring ambient humidity around problem walls. If readings consistently sit high during cooler months, targeted dehumidification or improved air circulation will do more long-term good than any cleaning product alone.
Condensation forms when warm, moisture-laden air contacts a cooler surface. On exterior walls, this typically occurs during autumn and winter mornings. The repeated wet-dry cycle softens surface coatings, degrades mortar, and creates the micro-texture that mould anchors to. Addressing ventilation and drainage around these surfaces is the foundation of any lasting prevention strategy.
Best Mould Killer for Exterior Walls: What Actually Works
The most effective approach to choosing the best mould killer for exterior walls starts with matching the product to the surface material and the severity of the infestation. A product that works well on painted render may damage untreated timber, and a diluted household solution that handles light mildew will not touch an established biofilm.
Bleach Solutions vs. Fungicide-Based Products
A diluted bleach solution remains one of the most widely used treatments for mould on non-porous exterior surfaces. The standard approach is a mix of one part bleach to four parts water, applied with a brush or low-pressure sprayer, left to dwell for 15 to 20 minutes, then rinsed thoroughly.
The limitation of bleach is significant. It kills surface growth but does not penetrate deeply into porous surfaces, which means established fungal colonies within brick or render can survive and regenerate. Bleach also degrades surrounding vegetation if runoff is not managed carefully.
Fungicide-based products are formulated specifically to penetrate porous surfaces and inhibit regrowth over a longer period. For properties with recurring mould problems, a fungicide is almost always the better long-term investment.
Always apply mould-killing treatments to a clean, dry surface. Applying fungicide over an existing biofilm or dirty surface dramatically reduces penetration and effectiveness. Surface preparation is not optional, it is what separates a treatment that lasts from one that fails by the next wet season.
Eco-Friendly and Non-Toxic Alternatives
White vinegar at full concentration is a genuine antifungal agent that kills many common mould species without the environmental risks associated with bleach. Hydrogen peroxide solutions, typically at three to six percent concentration, are another non-toxic option that breaks down into water and oxygen after use.
The honest limitation of eco-friendly alternatives is that they require more manual effort and more frequent reapplication than stronger chemical treatments. For light maintenance cleaning, they are excellent. For a serious, established mould problem, they are rarely sufficient on their own.
According to Safe Work Australia guidance on hazardous chemicals, anyone using chemical cleaning agents outdoors should wear appropriate protective equipment, including a respirator rated for vapour, chemical-resistant gloves, and eye protection.
Step-by-Step Mold Removal and Surface Preparation
Surface preparation is the part most guides rush through, and it is exactly where most DIY attempts fall short.
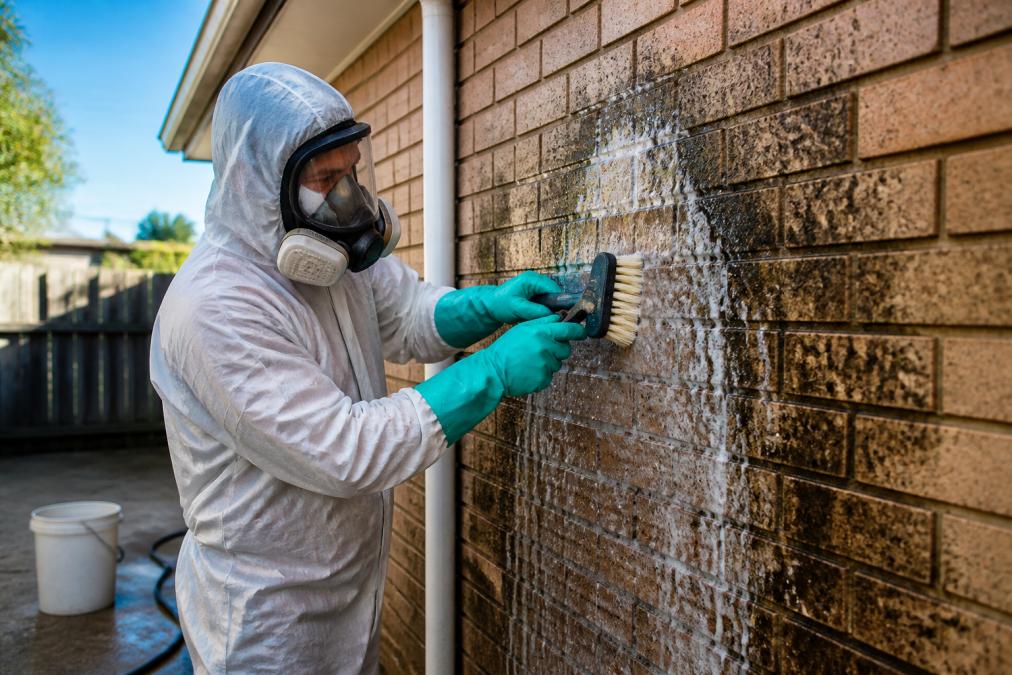
Step 1: Gear up properly. Wear a respirator rated for mould spores and chemical vapours, chemical-resistant gloves, safety glasses, and old clothing you can wash or discard.
Step 2: Pre-wet surrounding vegetation. Thoroughly water any plants, lawn, or garden beds adjacent to the work area to dilute any chemical runoff.
Step 3: Apply your chosen treatment. Using a brush, roller, or low-pressure sprayer, apply your bleach solution, fungicide, or eco-friendly detergent to the affected surface, working from top to bottom.
Step 4: Allow dwell time. Let the product sit for the manufacturer’s recommended period, typically 15 to 30 minutes. Mist lightly if conditions are hot and windy to keep it active.
Step 5: Scrub the surface. Use a stiff-bristled brush appropriate to the surface material. Brick and concrete tolerate firm scrubbing. Painted render and timber require a softer approach.
Step 6: Rinse thoroughly. Flush the treated area with clean water, working top to bottom. For larger areas, a low-pressure wash is effective.
Step 7: Inspect and treat again if needed. Severe mould may require a second application. Allow the surface to dry completely between treatments.
Step 8: Apply a preventative coating. Once the surface is fully dry, apply an anti-mould paint or sealant appropriate to the material.
| Step | Action | Key Detail |
|---|---|---|
| 1 | Protective equipment | Respirator, gloves, eye protection |
| 2 | Pre-wet vegetation | Reduces chemical runoff damage |
| 3 | Apply treatment | Top to bottom, even coverage |
| 4 | Dwell time | 15-30 minutes, keep moist |
| 5 | Scrub | Match brush firmness to surface |
| 6 | Rinse | Low-pressure, top to bottom |
| 7 | Re-treat if needed | Dry fully between applications |
| 8 | Apply protective coating | Anti-mould paint or sealant |
Preventing Mould on Timber Cladding and Other Porous Surfaces
Timber cladding requires a different approach to mould prevention than brick or concrete. Timber is highly porous, expands and contracts with temperature and humidity changes, and is more susceptible to surface damage from aggressive cleaning chemicals.
The biggest mistake with timber cladding is using bleach at full strength. A diluted solution, no stronger than one part bleach to six parts water, is safer. Better still, use a fungicide specifically formulated for timber, which will penetrate the grain without causing surface damage.
After cleaning, timber must dry completely before any sealant or coating is applied. Sealing over damp timber traps moisture inside, which accelerates both mould growth and timber decay. Vegetation growing against the wall restricts air circulation and holds moisture against the surface. Trimming back plants and ensuring a clear gap between garden beds and the wall makes a measurable difference.
Sealants and Anti-Mould Paint for Brick, Render, and Timber
Anti-mould paint is not a substitute for proper cleaning and surface preparation. It is the final layer of a prevention system. Applied correctly to a clean, dry surface, a quality anti-mould paint creates a barrier that inhibits future spore attachment and growth.
For brick and render, a breathable waterproofing sealant applied before the topcoat allows moisture vapour to escape from within the wall while blocking liquid water ingress. For timber, penetrating oil-based or water-based timber treatments that include fungicide additives outperform surface-only paints because they protect from within the material. Most quality timber treatments require renewal every two to three years in exposed conditions.
According to Australian Government’s Your Home technical manual on moisture management, appropriate surface coatings and adequate ventilation are both essential components of long-term moisture control in residential construction.
Never apply anti-mould paint or sealant over an active mould infestation. The spores beneath the coating will continue to grow, eventually breaking through the surface and causing the paint to bubble, flake, and fail prematurely.
Seasonal Maintenance Schedule for Mold Regrowth Prevention
A structured maintenance schedule is the most practical tool for preventing mold regrowth on exterior walls before it becomes a remediation job.
Autumn (March to May): Inspect all exterior walls for early mould and mildew signs, particularly on south-facing and shaded surfaces. Clean gutters and check downpipes for blockages. Check sealants and caulking around windows and doors. Apply preventative fungicide treatment to any walls that showed growth in the previous season.
Winter (June to August): Monitor humidity levels around problem walls using a hygrometer. Ensure air circulation is maintained around wall surfaces. Inspect for water ingress after heavy rain events. Address any cracked render or mortar promptly.
Spring (September to November): Conduct a full exterior inspection. Clean any mildew that developed over winter before warmer temperatures accelerate spore growth. Reapply timber treatments or sealants that are due for renewal. Trim vegetation growing close to walls.
Summer (December to February): Rinse exterior walls with clean water monthly to remove organic material that mould feeds on. Check that drainage around the property perimeter is functioning correctly.
Gutter Maintenance, Drainage, and Ventilation Checks
Blocked gutters overflow during rain events, directing water down exterior walls rather than away from the building. This repeated saturation of wall surfaces is one of the most common causes of recurring mould in well-maintained properties.
Check gutters at minimum twice per year, before the main autumn rain season and again in spring. Clear leaf litter, debris, and any blockages from downpipes. Ensure downpipes discharge away from the building foundation.
Drainage around the building perimeter matters equally. Soil that slopes toward the foundation allows water to pool against the base of exterior walls. Grading the soil to slope away from the building reduces ground-level moisture ingress significantly.
Ventilation under suspended timber floors and in roof cavities also affects exterior wall moisture. Poor subfloor ventilation allows humidity to build up within the building structure, which then migrates outward through wall materials. As noted in guidance from the Australian Building Codes Board on moisture and condensation, adequate ventilation is a fundamental requirement for managing condensation and moisture-related damage in residential buildings.
Professional Exterior Pressure Cleaning Services: When to Call In Experts
There is a point where DIY mould treatment stops being practical and starts being counterproductive. Recognising that point early saves time, money, and potential surface damage.
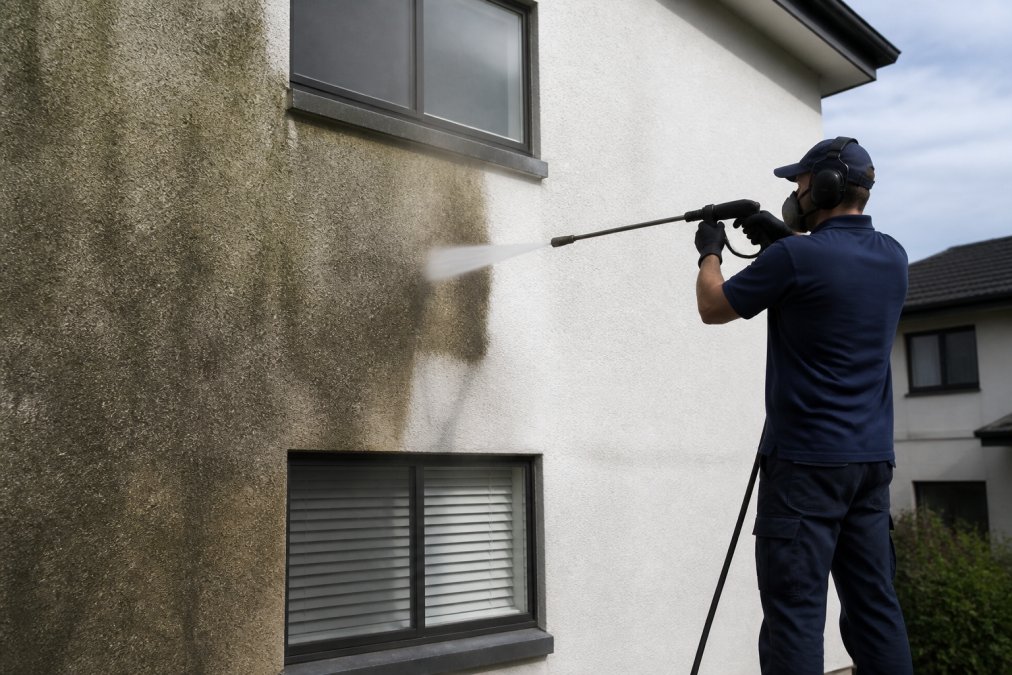
Professional exterior pressure cleaning services are the right call when the affected area is large, when mould has penetrated deeply into the surface, when the wall material requires specialist technique to avoid damage, or when previous DIY attempts have failed to produce lasting results. Pressure washing, applied at the correct pressure and angle for the specific surface material, removes embedded biofilm and organic matter far more effectively than manual scrubbing alone.
The risk with DIY pressure washing is significant. Too much pressure on painted render, aged brick, or timber cladding causes surface damage that is expensive to repair and creates a more porous surface that is even more susceptible to future mould growth.
AquaBlast Elite’s team brings specialist high-pressure cleaning equipment and years of experience treating mould-affected surfaces across residential, commercial, and industrial properties. Our approach is calibrated to the specific surface, which means results that restore the appearance of the wall without compromising its integrity. For properties being prepared for sale, for commercial buildings where appearance reflects directly on brand perception, or for any situation where the mould problem has gone beyond what surface treatment can address, professional remediation is the correct investment.
Professional pressure cleaning resets the surface condition so that preventative treatments, sealants, and coatings can actually work. A professionally cleaned surface gives every subsequent prevention measure the best possible foundation.
Conclusion
Mould on exterior walls is a solvable problem, but only when the moisture source driving it is addressed alongside the surface treatment. Preventing mold regrowth on exterior walls long-term means combining the right cleaning agents, appropriate surface coatings, and a consistent seasonal maintenance routine.
AquaBlast Elite provides professional exterior pressure cleaning services for residential, commercial, and industrial properties, using specialist equipment and surface-specific techniques that deliver results beyond what DIY methods can achieve. Whether you are dealing with an established mould problem or preparing a property for sale, our team restores surfaces and creates the clean foundation that preventative treatments require to work. Book a call with AquaBlast Elite to discuss your property’s specific needs and get a clear plan for keeping mould from coming back.
=== FAQ ANSWERS (audit these too, same rules) ===
[1] Q: How do I stop mould from returning to my exterior walls?
A: Preventing mold regrowth on exterior walls requires addressing the root cause, not just the surface. After removing existing mould with a fungicide or bleach solution, apply an anti-mould paint or waterproof sealant suited to your wall material. Control moisture by fixing gutters, improving drainage, and trimming overhanging vegetation that traps humidity. A seasonal maintenance schedule, including an annual pressure clean, keeps fungal colonies from re-establishing on porous surfaces.
[2] Q: What is the most effective way to kill mould on house exteriors?
A: The best mould killer for exterior walls depends on the surface. On non-porous surfaces like concrete, a diluted bleach solution (one part bleach to four parts water) kills spores effectively with proper scrubbing. On timber cladding or painted render, a purpose-made fungicide is safer and less likely to cause discolouration. Always wear a respirator and protective gloves. For heavy or recurring biofilm, professional pressure cleaning combined with a post-treatment fungicide gives the most lasting result.
[3] Q: Does pressure cleaning prevent mould regrowth?
A: Pressure washing removes existing mould, mildew, and biofilm from exterior walls, which is an essential first step. On its own, it does not prevent regrowth because it does not change the underlying moisture conditions. For lasting prevention, pressure cleaning should be followed by a fungicide treatment, an appropriate sealant or anti-mould paint, and improvements to drainage and ventilation. Professional exterior pressure cleaning services combine all these steps for a more durable outcome.
[4] Q: Are there specific sealants that stop mould on brick or timber?
A: Yes. For brick and masonry, a penetrating silicone or silane-siloxane waterproofing sealer reduces water ingress significantly, which starves mould spores of the moisture they need. For timber cladding, a UV-stable, mould-inhibiting timber oil or paint with a fungicide additive is the standard approach. Reapplication intervals vary by product and exposure, but most sealants on exterior surfaces need refreshing every two to five years depending on weather conditions and sun exposure.
Frequently Asked Questions
How do I stop mould from returning to my exterior walls?
Preventing mold regrowth on exterior walls requires addressing the root cause, not just the surface. After removing existing mould with a fungicide or bleach solution, apply an anti-mould paint or waterproof sealant suited to your wall material. Control moisture by fixing gutters, improving drainage, and trimming overhanging vegetation that traps humidity. A seasonal maintenance schedule, including an annual pressure clean, keeps fungal colonies from re-establishing on porous surfaces.
What is the most effective way to kill mould on house exteriors?
The best mould killer for exterior walls depends on the surface. On non-porous surfaces like concrete, a diluted bleach solution (one part bleach to four parts water) kills spores effectively with proper scrubbing. On timber cladding or painted render, a purpose-made fungicide is safer and less likely to cause discolouration. Always wear a respirator and protective gloves. For heavy or recurring biofilm, professional pressure cleaning combined with a post-treatment fungicide gives the most lasting result.
Does pressure cleaning prevent mould regrowth?
Pressure washing removes existing mould, mildew, and biofilm from exterior walls, which is an essential first step. On its own, it does not prevent regrowth because it does not change the underlying moisture conditions. For lasting prevention, pressure cleaning should be followed by a fungicide treatment, an appropriate sealant or anti-mould paint, and improvements to drainage and ventilation. Professional exterior pressure cleaning services combine all these steps for a more durable outcome.
Are there specific sealants that stop mould on brick or timber?
Yes. For brick and masonry, a penetrating silicone or silane-siloxane waterproofing sealer reduces water ingress significantly, which starves mould spores of the moisture they need. For timber cladding, a UV-stable, mould-inhibiting timber oil or paint with a fungicide additive is the standard approach. Reapplication intervals vary by product and exposure, but most sealants on exterior surfaces need refreshing every two to five years depending on weather conditions and sun exposure.
This article was written using GrandRanker